

Synology Assistant Download Mac Os X
Synology Assistant Download Mac Os X
Frustrated trying to install Domicile Assistant on Mac Bone X? Looking for a complete step-past-step installation guide that simplifies the process? Wait no further!
Information technology became apparent to me that a combination of the numerous installation methods and lack of consummate information meant that the process of installing Home Assistant on Mac would be frustrating, even for those who are technically adept.
Therefore I felt that there was some space on the web for a Mac-centric Home Assistant installation guide. In this tutorial we volition walk through the process of installing Abode Assistant. I am not going to lie… we volition be using final. But fearfulness non! You need not be a Terminal-ninja.
- Prerequisite
- Why run Dwelling Assistant On Mac?
- What is Virtualenv?
- Install Home Assistant
- Accessing Habitation Assistant
- Conclusion
Prerequisite
Y'all volition of form need a Mac running its native OS X operating arrangement. At the time of writing I am running Mojave and so I would recommend that y'all have this as a minimum to avoid and problems.
You will also need to have Python 3 installed on your arrangement, you can download and install information technology from the Python website.
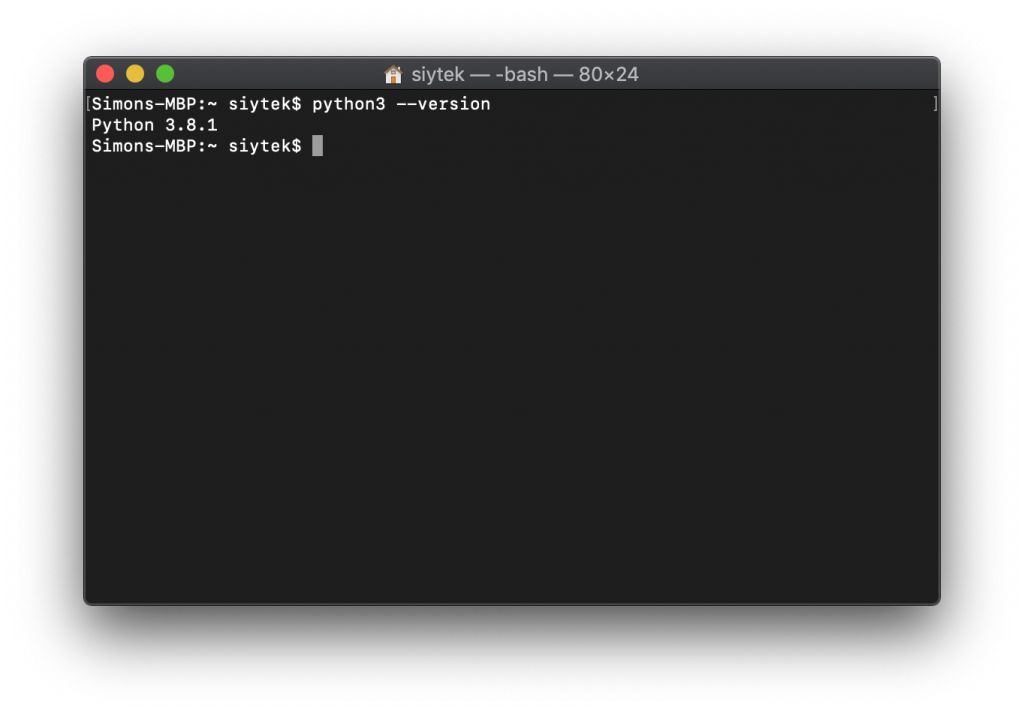
If you are unsure, goto the applications > utilities folder and open the Concluding app. Then blazon the following command.
python3 --version
If the version 3.x.ten is returned then you already accept information technology. If not and then simply download the installer and follow the installation instructions.
Why run Dwelling house Banana On Mac?
Bated from wanting to accept a play with Abode Assistant on your local machine, why would you want to install Domicile Assistant on your Mac?
In full general Home Assistant is meant to exist a server-based application, pregnant it runs on a remote computer hidden away in your dwelling and is accessed remotely via a web browser or the companion app. The about common weapon of choice is to use a Raspberry Pi.
However there is ane superb reason to install Domicile Assistant on Mac! I accept had several old MacBook Pro'southward lying around since forever, which practice not accept plenty value to bother listing on eBay just that have too much sentimental value to dispose of.
If you have an erstwhile Mac that you lot wish to recycle, you can give it a second life as a Home Banana server! A machine almost a decade old will still compete with the latest Raspberry Pi and can double up as a network hard drive.
This is exactly what I have done with an old 2009 MacBook Pro, now running headless in the Television set cabinet equally the "TekHouse" Home Banana server!

What is Virtualenv?
What on world is Virtualenv? To understand this nosotros need to understand what Python is. Python is a programming language that can be used to develop apps for all different kinds of platforms.
In that location are many packages available that Python developers tin use in their applications, which give various functionality without having to re-write the same code over and once more. These are stored globally in a directory called site-packages.
This can withal cause a problem if different versions of the aforementioned packet are required for different applications. In social club to solve this problem, we can install a Python program and all of the necessary packages locally.
Our program can and then use the correct local version of each package rather than referencing the global site-packages directory. The relevant Python program and all of the necessary packages are bundled together in one neat little packet chosen a virtual environment.
Virtualenv is the tool required to create a virtual environment for a Python programme. Information technology is very easy to use and we will encompass the installation and setup of our Home Banana virtual environment step-by-step.
Install Virtualenv
First we need to goto the awarding > utilities folder and open upwardly a Terminal window. And so simply type the following command to install Virtualenv.
pip install virtualenv
All of the necessary files will exist downloaded and Virtualenv will be installed automatically, nice and easy!
Create virtual environment
Side by side we need to create a virtual surroundings from which nosotros wish to run Home Assistant. This exists simply every bit a folder on the difficult drive so nosotros can think of it as the installation directory.
Offset navigate to the location that yous wish to install Home Assistant. I volition use the Documents binder only y'all tin choose a dissimilar location if you like. Go ahead and blazon the following command.
cd ~/Documents
Now we can create the virtual environment. This will also create the folder where we volition install Home Banana. Go alee and type the following control.
python3 -one thousand venv homeassistant
Once we have created the virtual environment, we need to actuate it. This is done past simply entering the post-obit command.
source homeassistant/bin/actuate
Install Home Assistant
Now that our virtual surround is setup and activated, we can install Home Banana by typing the post-obit command.
pip3 install homeassistant
Pip will download and install all of the necessary files so perchance become make a nice beverage while the script runs. Once complete we need to alter to the directory containing the hass script so go ahead and type the following command.
cd homeassistant/bin/
Run Home Assistant from the last
If you wish to just run Dwelling Assistant in the electric current terminal window, you can type the following command.
./hass
Yous will run into the terminal spring into activeness, reporting a long list of information every bit information technology starts up. Note that you will not be returned to the command prompt whilst it runs as it is not running in the background.
If yous desire to stop Home Assistant and return to the command prompt, only press ctrl + C.
Run Home Assistant as a system service
Alternatively if y'all would like Home Banana to run in the background equally a arrangement service yous can type the following command.
hass --script macos install
This volition start Dwelling house Assistant in the background of your system and information technology will also setup your organization to start Home Assistant on boot upwardly. Note that it takes a minute or ii for Dwelling house Assistant to work following a reboot.
Once you accept run the script you volition be presented with the following message and then returned to the command prompt.
Home Assistant has been installed. Open information technology here: http://localhost:8123
Accessing Abode Assistant
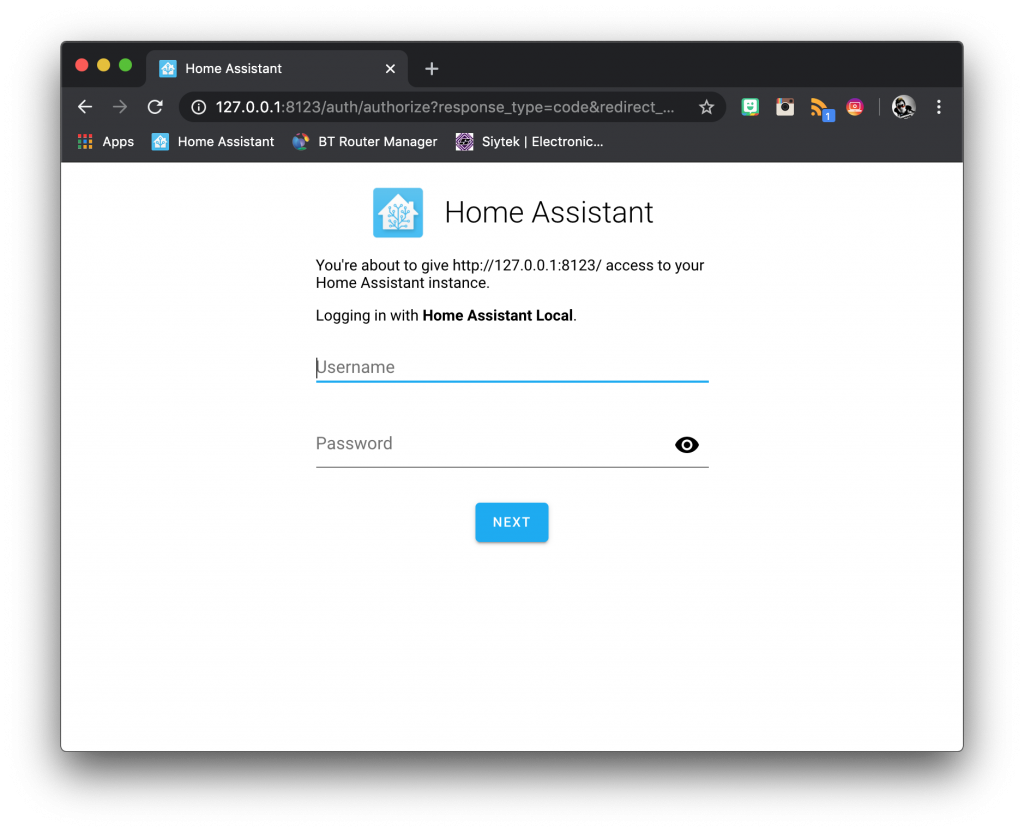
We are all done! Get ahead and enter the exit control into terminal and close the window. You tin now navigate to Home Assistant in your browser by typing the post-obit address.
http://127.0.0.1:8123
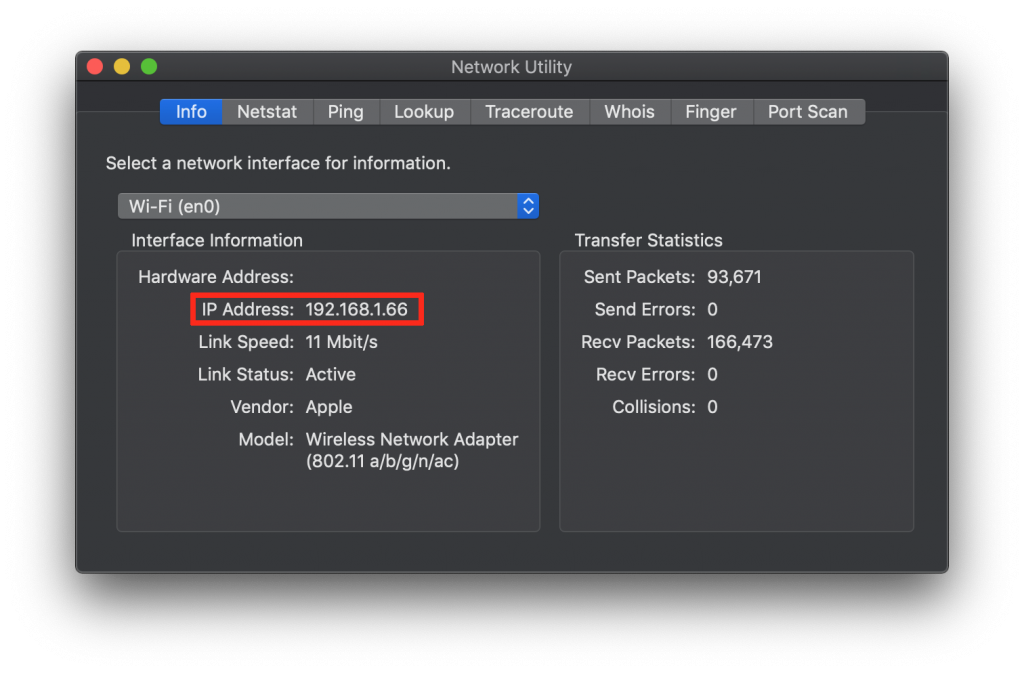
If yous want to admission your Home Banana from a remote browser, just employ the local IP address of your auto instead. You can see your local IP address in the network utility, which y'all tin discover by typing it into Spotlight Search.
Determination
Home Assistant is a very versatile program and can be run on a variety of operating systems.
With a few uncomplicated commands and by making use of Virtualenv, we tin can easily install and run it on Mac OS, possibly saving a once-loved and crumbling Mac from the scrap heap!
At present that y'all have Home Assistant up and running, go ahead and bank check out one of my other awesome tutorials showing yous some of the absurd things that yous can practise with Home Assistant!

Comments
Post a Comment